Installation
Before you start
Make sure you have the following devices and tools available:
- Linux Host PC Ubuntu (with 50 GB free space) with Internet connection
- USB type A - micro USB cable (OTG cable)
- ADLINK DLAP-201-JT2/mSATA (with 500 GB SSD) with - keyboard, monitor attached (HDMI), Eth0 port connected (port closest to the power switch)
- Reset pins (2 x SIM removal pin or paper clip as equivalent) for pressing the reset and recovery buttons at the same time on DLAP-201-JT2
Prepare your device
DLAP-201-JT2/mSATA needs to be set to RECOVERY MODE Set by step instructions are available in the Vendor Documentation (Section: 3.2 System Recovery).
Perform the following steps:
Client (DLAP-201-JT2)
Connect the OTG cable to the USB 2.0 port.
Press the reset and recovery buttons at the same time.
Press the power switch.
Release the reset button.
Release the recovery button.
Host PC
Install Python 2.7, python-minimal (or equivalent packages) and qemu-user-static on the host PC.
Connect the host PC to the client via OTG cable.
Open a terminal on the host PC and run this command:
# lsusb

Look for “NVidia Corp.” in the output (an example is circled in red in the screenshot above). If found, the host PC recognizes the client and you may proceed. If not, double-check the OTG cable connection and perform troubleshooting as needed until the client is recognized.
Download the U-alarm image and flasher.
Now run the following commands in the directory that contains your downloaded U-alarm flasher file:
# sudo tar xzvf Ualarm_installer_for_DLAP-201-JT_latest.tar.gz
> \# cd Ualarm_installer_for_DLAP-201-JT_latest


> \# sudo ./flash.sh -r jetson-tx2 mmcblk0p1
NOTE: Progress may take up to 15 minutes.
- Allow the update to complete. If flashing was successful, the box will restart and you will be able to login.
Installation
- To complete your installation, attach a monitor and keyboard to the DLAP-201-JT. Log in through console with the following default credentials:
username: ultinous
password: temppassword
Issue the following commands: ultinous@ualarm:~$ sudo -i [sudo] password for ultinous: temppassword
# /opt/ualarm/ualarm.installer.py
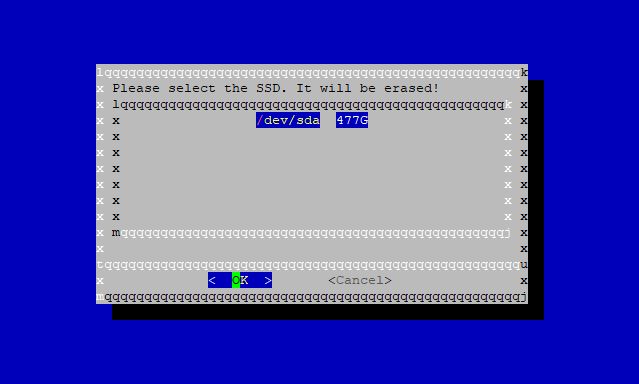
Select OK and press ENTER.

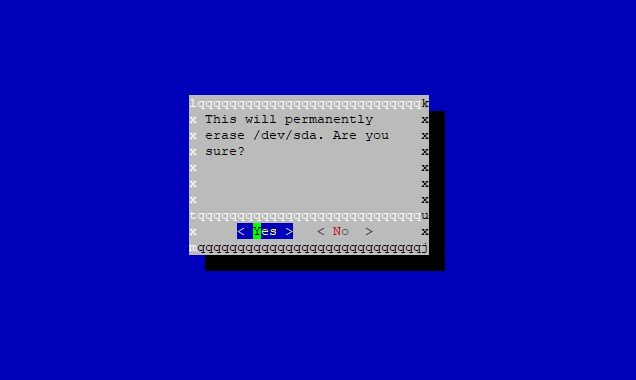
- Select YES and press ENTER.

After installation was successful, the installer will ask you to restart the device. It's recommended to write down the IP address of the device before that.
To get the IP address of the device, issue the following command:
root@ualarm:~# ip -4 -br a sh dev eth0 eth0 UP 192.168.1.100/24
Reboot the device.
root@ualarm:~# reboot
It may take up to 5 minutes for the box to boot up and initiate all services.
Next steps
To configure U-alarm, follow the steps in U-alarm User's guide.
