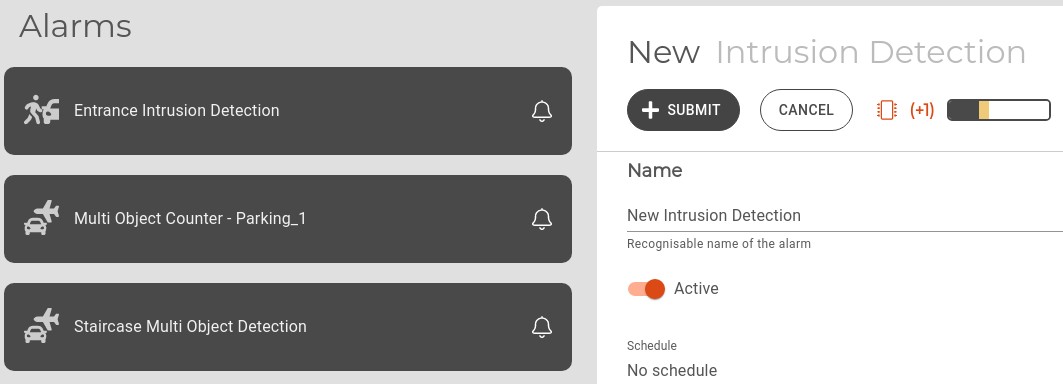
Alarms and Counters
Alarms are processes for detecting incidents.
Click the Alarms menu on the left sidebar for this view.
Before you start
Please make sure that all Cameras are registered and activated in U-Alarm.
When adding Alarms or Counters, make sure to take into account the Analysis Slots they would take up.
Supported Alarms
Intrusion Detection
An Intrusion Detection alarm is triggered whenever a person or ground vehicle is detected in a restricted area. It has high accuracy and low false alarm rate even at long range and with different light conditions.
Core technology: full body and ground vehicle detection.
Full body detection distance and accuracy is high, compared to head detection.
Available classes: person, car, bus, truck, motorcycle, bicycle
Compatible with fixed, PTZ, and thermal cameras.
Areas of interest can be defined.
Send alarm notifications to third-party software.
Multi Object Detection

A Multi Object Detection alarm is triggered whenever people or vehicles (ground, air and watercraft) are detected within a set time frame or location. It has high accuracy and low false alarm rate even at long range and with different light conditions. This method of detection is ideal for specialised use cases that require the detection, classification and filtering of objects, to determine if the following is true:
| Person or Vehicle is: | Use case example |
|---|---|
| at the wrong place | Truck blocking an emergency exit |
| at the wrong time | A vehicle is detected at night in a daytime-only parking lot |
| of the wrong type | Motorcycle occupying a bicycle parking spot |
- Core technology: full body and vehicle detection.
- Available classes: person, car, bus, truck, motorcycle, bicycle, train, boat, airplane
- Compatible with fixed, PTZ, and thermal cameras.
- Areas of interest can be defined.
- Send alarm notifications to third-party software.
Crowd Detection

A Crowd Detection alarm is triggered whenever the number of currently visible people reaches or exceeds a specific number. Multiple cameras can be associated with a single Crowd Detection, in which case the sum of the people triggers the alarm. This use case is ideal for detecting the extreme size of a queue or for detecting a potentially dangerous situation in a safety zone. Recommended for well lit areas.
- Core technology: head detection.
- Compatible with fixed, PTZ, and thermal cameras.
- Areas of interest can be defined.
- Send alarm notifications to third-party software.
- Multi-camera support.
Supported Counters
Counters are designed to be used with custom third party software. See the Counter API section for detailed instructions.
Multi Object Counter

Multi Object Counter is a tool for classifying and measuring the amount of the chosen type(s) of objects. Multiple cameras can be associated with a single Multi Object Counter - This enables the measurement of different object classes, as well as a single object type in two or more separate locations (such as counting the sum of cars in two parking lot areas) as well.
- Core technology: full body and vehicle detection.
- Compatible with fixed, PTZ, and thermal cameras.
- Areas of interest can be defined.
- Send data to third-party software.
- Multi-camera support.
The data produced by Multi Object Counters can be accessed by third-party tools - see the Counter API section for integration instructions - as well as in U-Alarm, in the Events screen.
Analysis Slots
One camera stream is able to handle up to two types of detections (including Counters) - If you add an already associated Camera to a different type of Alarm or Counter too, it will fill up the stream's "quota".
A dark grey (so-called "Analysis Slots") indicator keeps track of this, in the upper right corner of the Alarms screen and on the New/Change Alarm screen. Click on the indicator to see how many free Slots you have.
NOTE: If the dark grey indicator fills up, you will have reached your limit and cannot add another Alarm or Counter.
Create a new alarm or counter
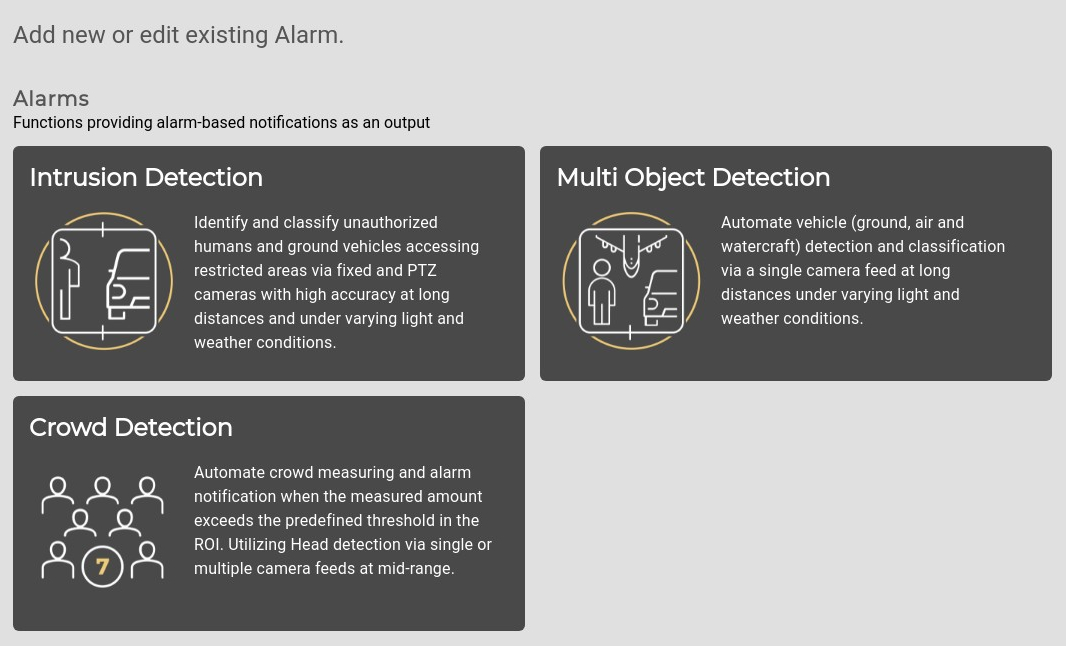
Note: Currently, only one type of the alarm can be used at the same time per device.
New Intrusion Detection
- Choose Intrusion Detection by clicking on its box. Fill in the form, as follows:
- Name: A readable name of this alarm. This name will appear in the Events view and in all notifications.
- Armed: The alarm can be deactivated here. Armed by default.
- Schedule (optional): You can associate one of your previously defined Schedules with this alarm.
- Add Camera: Select a camera from the list.
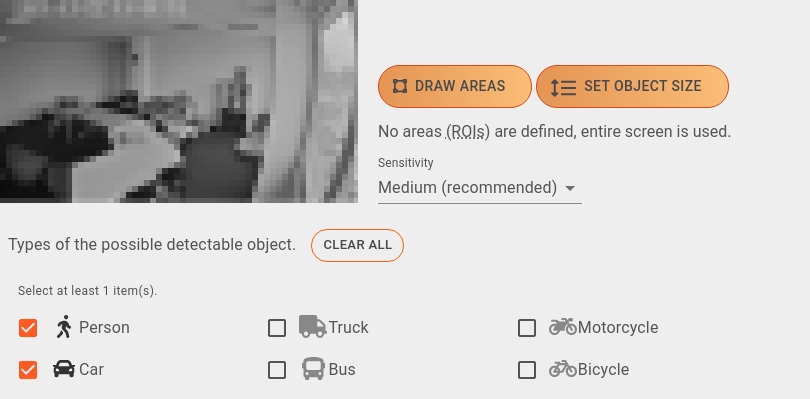
- Draw Areas (ROIs) (optional): Sometimes the alarm should be limited to a specific area of the video. If you would like to observe only a specific area, it can be determined here. Clicking this button makes the Camera Editor appear. Without ROIs, the entire area will be observed.

Set object size (optional): If you have a good idea of what pixel range the detected objects would fall into, you can customise the minimum and maximum height size of detections, in pixels, here. This would ensure that only objects that fit into that range would get detected, resulting in a further decrease in the number of false alarms.
Move the the arrows by clicking and dragging them to help you determine the optimal values. Adjust the slider's endpoints on the bottom part of the screen to set the minimum / maximum values. Click Set sizes to save your changes, or Discard to cancel them.
NOTE: Take care that any object below or above the set range will NOT be detected, possibly resulting in missing incidents. It is good practice to set the minimum size slightly below, and the maximum size slightly above the desired amount.
For example: If using U-Alarm with a combination of radar and PTZ cameras, setting custom object sizes would result in detections only if the radar have detected movement - since setting the proper minimum size would rule out random noise causing false detections.
Sensitivity : The sensitivity of the detector can be fine tuned here. Lowering the sensitivity causes less false detections but decreases accuracy. Increasing it results in more alarms but may cause more false detections as well. The default sensitivity is Medium.
Object types: Choose any number of object types from this list. Click Clear all to reset your selections. Please select at least 1 category.
Cooldown: After an alarm is triggered, it won't be triggered again for the specified duration.
HTTP Client configuration (optional):
Use this feature to send triggered events to a third-party software with an optional snapshot image of the incident attached. It is also possible to include an End of Event timestamp, which triggers if 5 seconds have passed without incidents after the initial event that triggered the HTTP message. End of Event occurs once the incident is over.
The following information should be provided by the third-party software's administrator:
- Enable HTTP client: Enables / disables event sending.
- Target URL: The location of the API.
- Header key and value: Key and value of custom HTTP header. Click the Add button to add more Keys. To delete a Key, press the Trash icon next to it.
- Trust all certificates: If enabled, HTTPS certification errors will be ignored.
NOTE: Custom CA certificates can be uploaded in the Trusted Certificates setting.
- Enable snapshot attach: Off by default, only turn snapshot sending on if explicitly required. See the Snapshot part of the guide for its properties.
- Send end of intrusion event: Enables / disables End of Event sending. Note that the Cooldown setting of the Alarm has no effect on this.
End of Event records are sent as part of HTTP messages. They are not available in Milestone XProtect or in e-mail format.
Test Event: To test your integration, click the Send Test Event button after the HTTP client settings are set.
Email notification configuration (optional):
This feature allows you to send alarms via e-mail to designated recipients.
IMPORTANT: Make sure that sender e-mail settings are already set! See the Sender configuration section for instructions.
Click the Submit button to save your settings.
New Multi Object Detection
To add a Multi Object Detection alarm, follow the steps as laid out in New Intrusion Detection.
Compared to Intrusion Detection, you can detect 3 more types of objects (train, boat, airplane) with this feature.
Before setting up HTTP / End of event message sending for Multi Object Detection alarms, consider reading the guide for third-party integration first.
New Crowd Detection
- Choose Crowd Detection by clicking on its box. Fill the form, as follows:
- Name: A readable name of this alarm. This name will appear in the Events view and in all notifications.
- Armed: The alarm can be deactivated here. Armed by default.
- Schedule (optional): You can associate one of your previously defined Schedules with this alarm.
- Critical number of people: This alarm will be triggered if the sum of the people (considering all associated cameras) reaches or exceeds this number.
- Add Camera: Select one or more cameras from the list.
- You can add more than one camera for one Crowd Detection Alarm, since you may want to see an aggregated sum of all objects counted, spread across different cameras.
- You may also add the same camera multiple times, with different ROI and Sensitivity preferences.

- Draw Areas (ROIs) (optional): Sometimes the alarm should be narrowed to a specific area of the video. If you would like to observe only a specific area, it can be determined here. Clicking this button makes the Camera Editor appear. Without ROIs, the entire area will be observed.

Set object size (optional): If you have a good idea of what pixel range the detected objects would fall into, you can customise the minimum and maximum height size of detections, in pixels, here. This would ensure that only objects that fit into that range would get detected, resulting in a further decrease in the number of false alarms.
Move the the arrows by clicking and dragging them to help you determine the optimal values. Adjust the slider's endpoints on the bottom part of the screen to set the minimum / maximum values. Click Set sizes to save your changes, or Discard to cancel them.
NOTE: Take care that any object below or above the set range will NOT be detected, possibly resulting in missing incidents. It is good practice to set the minimum size slightly below, and the maximum size slightly above the desired amount.
For example: If using U-Alarm with a combination of radar and PTZ cameras, setting custom object sizes would result in detections only if the radar have detected movement - since setting the proper minimum size would rule out random noise causing false detections.
Sensitivity: The sensitivity of the detector can be fine tuned here. Lowering the sensitivity causes less false detections but decreases accuracy. Increasing it results in more alarms but may cause more false detections as well. The default sensitivity is Medium.
Click Change to swap your previously selected camera for a different one. Click Delete to remove your previously selected camera.
Cooldown: After an alarm is triggered, it won't be triggered for the specified duration.
HTTP Client configuration (optional):
Use this feature to send triggered events to a third-party software. The following information should be provided by the third-party software's administrator:
- Enable HTTP client: Enables / disables event sending.
- Target url: The location of the API.
- Header key and value: Key and value of custom HTTP header. Click the Add button to add more Keys. To delete a Key, press the Trash icon next to it.
- Trust all certificates: If enabled, HTTPS certification errors will be ignored.
NOTE: Custom CA certificates can be uploaded in the Trusted Certificates setting.
Test Event: To test your integration, click the Send Test Event button after the HTTP client settings are set.
Email notification configuration (optional):
This feature allows you to send alarms via e-mail to designated recipients.
IMPORTANT: Make sure that sender e-mail settings are already set! See the Sender configuration section for instructions.
Click the Submit button to save your settings.
New Multi Object Counter
- Scroll down to Counters, then choose Multi Object Counter by clicking on its box. Fill in the form, as follows:
- Name: A readable name of the counter for easy identification in the U-alarm user interface.
- Armed: The alarm can be deactivated here. Armed by default.
- Technical name: A unique name that identifies your Counter in the API.
- Add Camera: Select one or more cameras the counter should use from the list.
- You can add more than one camera for one counter, since you may want to see an aggregated sum of all objects counted, spread across different cameras.
- You may also add the same camera multiple times, with different ROI, Sensitivity and object type preferences.
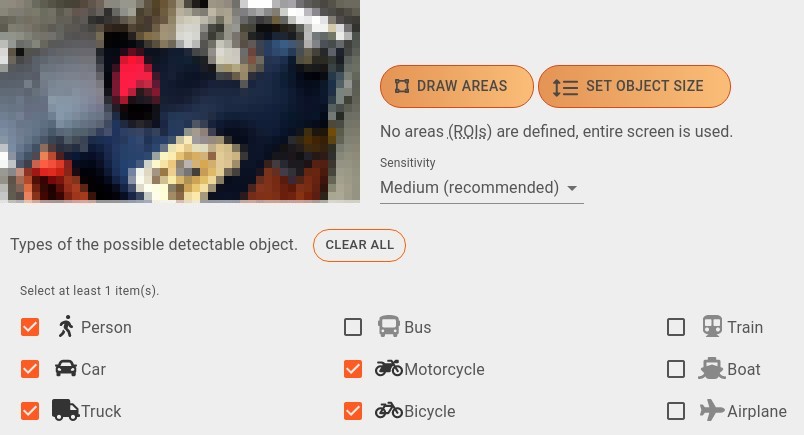
- Draw Areas (ROIs) (optional): Sometimes the counter should be limited to a specific area of the video. If you would like to observe only a specific area, it can be determined here. Clicking this button makes the Camera Editor appear. Without ROIs, the entire area will be observed.

Set object size (optional): If you have a good idea of what pixel range the detected objects would fall into, you can customise the minimum and maximum height size of detections, in pixels, here. This would ensure that only objects that fit into that range would get detected.
Move the the arrows by clicking and dragging them to help you determine the optimal values. Adjust the slider's endpoints on the bottom part of the screen to set the minimum / maximum values. Click Set sizes to save your changes, or Discard to cancel them.
Setting the minimum size below 50 would correspond to turning the parameter known in releases older than 2.1.0 as "Long-range detections" on. Enabling this will increase the detection range but will lower the analysis period to 1/5 of a second and increase the Analysis Slot usage by one.
NOTE: Take care that any object below or above the set range will NOT be detected, possibly resulting in missing incidents. It is good practice to set the minimum size slightly below, and the maximum size slightly above the desired amount.
For example: If using U-Alarm with a combination of radar and PTZ cameras, setting custom object sizes would result in detections only if the radar have detected movement - since setting the proper minimum size would rule out random noise causing false detections.
Sensitivity: The sensitivity of the detector can be fine tuned here. Lowering the sensitivity causes less false detections but decreases accuracy. Increasing it results in more alarms but may cause more false detections as well. The default sensitivity is Medium.
Object types: Choose any number of object types from this list. Click Clear all to reset your selections. Please select at least 1 category.
- To add the same camera to the counter, click Clone (optional). You may keep your settings as you set them previously, or modify the clone to your liking. Click Change to swap your previously selected camera for a different one. Click Delete to remove your previously selected camera.
- Aggregation frequency: The interval between aggregating the counted objects. Default is 5 seconds.
- Click the Submit button to save your camera and its clones if you added any.
To check the counter's detections inside U-Alarm, you can do so by opening the live view of the corresponding camera(s) in Cameras.
The data produced by Multi Object Counters can be accessed by third-party tools - see the Counter API section for integration instructions - as well as in U-Alarm, in the Events screen.
Edit an existing Alarm or Counter
- On the left side of the interface, find and click the alarm or counter you would like to modify in the Configured Alarms list.
- Edit your settings the same way this alarm or counter was created.
- Click the Save button or press the Revert button to cancel your edits.
Delete an existing Alarm or Counter
- On the left side of the interface, find and click the existing alarm or counter you would like to modify in the Configured Alarms list.
- Click the Delete button.
Using the U-Alarm Camera Editor
(formerly the Stream Configurator)
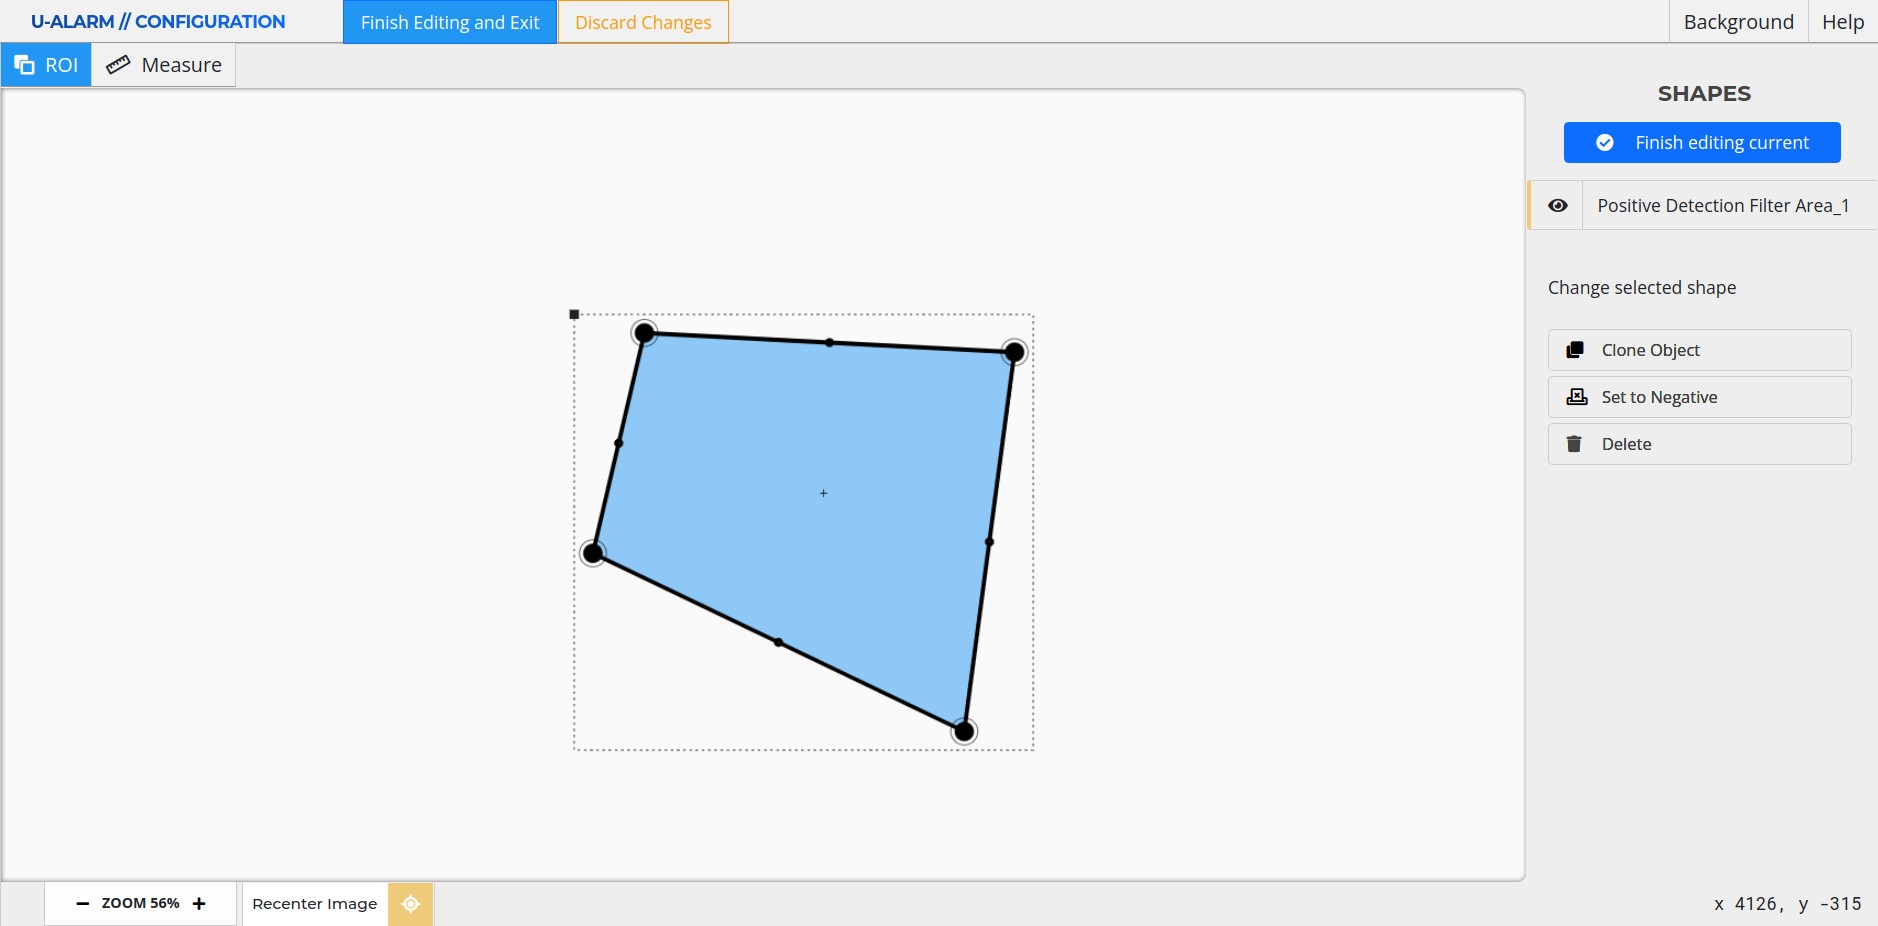
Basic Navigation
The scroll wheel zooms in and out of the canvas.
Middle-mouse button + drag moves the canvas. To reset to the center of the canvas, click the Go to Origin button. ![]()
The following functions are available at the top of the screen:
- Finish Editing and Exit button to save all changes and return to the Alarm page in U-Alarm.
NOTE: This only saves the changes made in the Editor - do not forget to press Save at the top of the Alarm page to add your changes to the Alarm itself.
- Discard Changes button to cancel all changes.
- Background, ROI and Measure buttons to open their respective tools and windows.
Shapes panel
- The list of created Areas are available here.
- Editing options for the currently selected Area can also be found here.
Drawing a new ROI
Select the ROI tool from the top toolbar (selected by default).
Define an area by simply clicking on the canvas to create nodes.
- Each step can be undone with a right-click.
- Click on the starting point to finish drawing the area (or double-click the last point).
The new Positive ROI will appear in the Shapes list.
You can draw more Areas: a camera can have an unlimited number of them.
Click the Finish editing current button at the top of the Shapes panel. You can exit the Camera Editor by the Finish Editing and Exit button, or cancel all changes with the Discard Changes button.
NOTE: This only saves the changes made in the Editor - do not forget to press Save at the top of the Alarm page to add your changes to the Alarm itself.
Negative Areas (optional)
Negative Areas can be used when posters, billboards or other design elements contain people, causing false alarms. In a Negative Area all detections will be ignored.
- Double click a ROI (or select it from the Shapes list).
- Click the Set to Negative button. Clicking the button again will change the area back to positive.
- Click the Finish editing current button at the top of the Shapes panel or click anywhere on the background to exit edit mode.
- The Area will turn red, indicating that it is a Negative Area.
Edit an existing ROI
- Double click a ROI (or select it from the Shapes list).
- Each node of the Area can be moved by dragging them with the mouse on the canvas.
- New nodes can be created by clicking on the mid-point of a section of the Area.
- The entire Area can be moved by dragging the black square at the top-left corner of the bounding box.
- Click the Finish editing current button at the top of the Shapes panel or click anywhere outside the bounds of the shape to exit the edit mode.
Delete an existing ROI
- Double click a ROI (or select it from the Elements list).
- Click the Delete button.
Additional Tools and Options
Background
By clicking the Background button, a detachable window will open, giving you the following options:
- The opacity of the background.
- Refresh the background image.
- Upload custom background image.
- Configure the background grid.
Measure
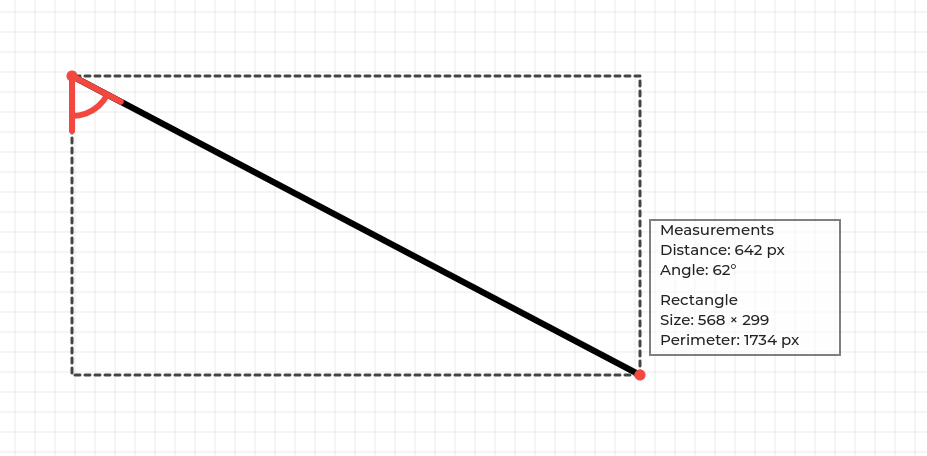
Enters into the Measuring mode. Left click sets the starting point and displays the distance between the starting point and the cursor location. It also calculates the size and perimeter of the rectangle where the ruler is the diagonal.
Next steps
You are most likely done with all mandatory settings. However, you can define Schedules for the alarms to only operate at specific times. Otherwise you can learn more about receiving Events.


