Quick Start Guide
Follow these steps to have a working U-alarm installation in roughly 5 minutes.
Before start
Make sure that everything in the First Steps section is done.
Step 1 - Add a camera
To do any video analysis we need a video stream. U-alarm can read video streams via RTSP protocol. Follow these steps to add a new stream:
- Click on Cameras on the left menu bar
- Click on the Add button.
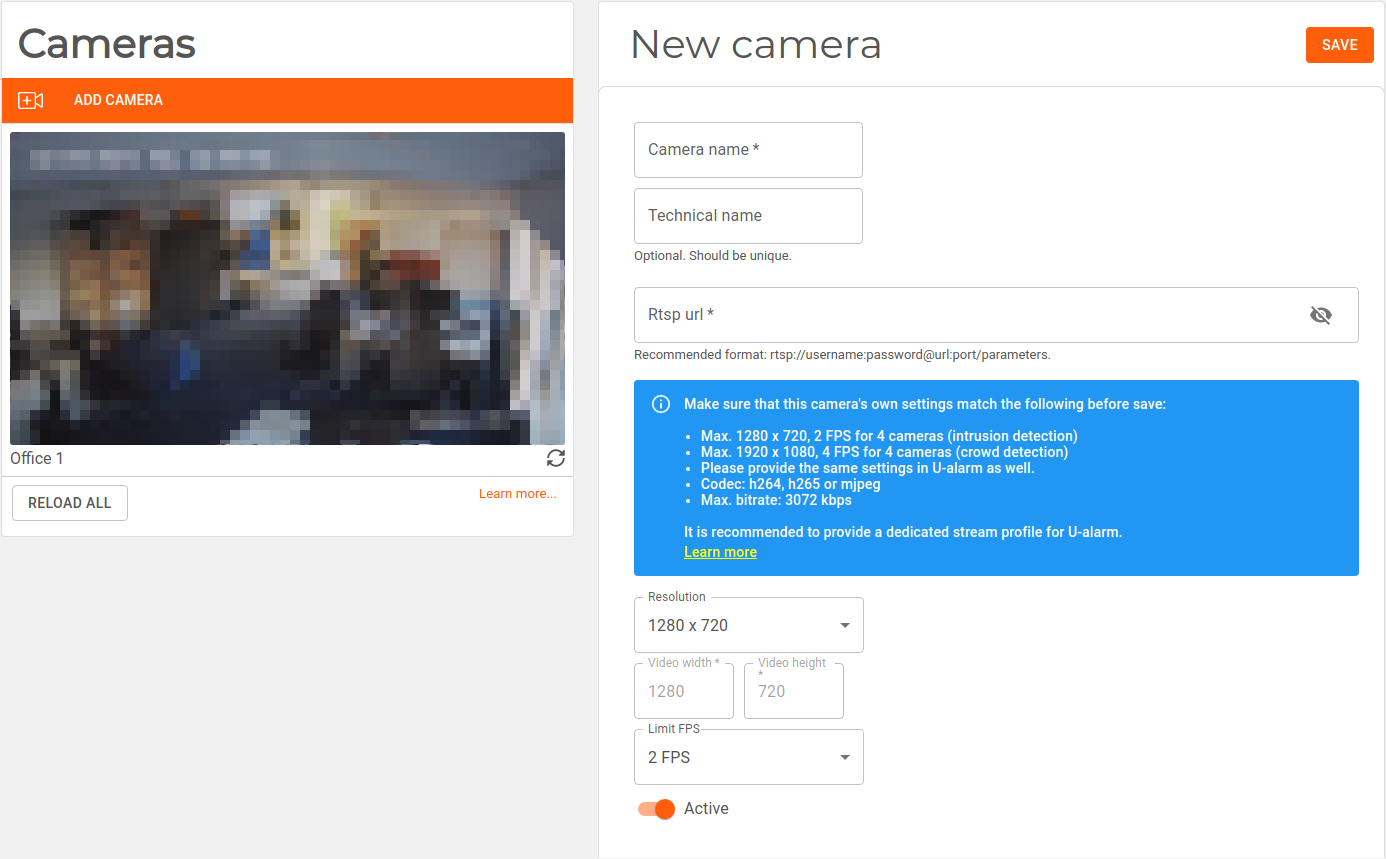
On the New camera box you need to enter basic information about the video stream. It is recommended to name the camera after the observed location (eg: Entrance). Make sure that the provided FPS, width and height information exactly matches the camera stream (if not, set the appropriate values in your camera's own settings).
Note: This version of U-alarm supports up to 4 cameras with max. 1920 x 1080 resolution at 4 FPS.
Press Save when finished. If the new camera's name appears in the Cameras' list you can proceed.
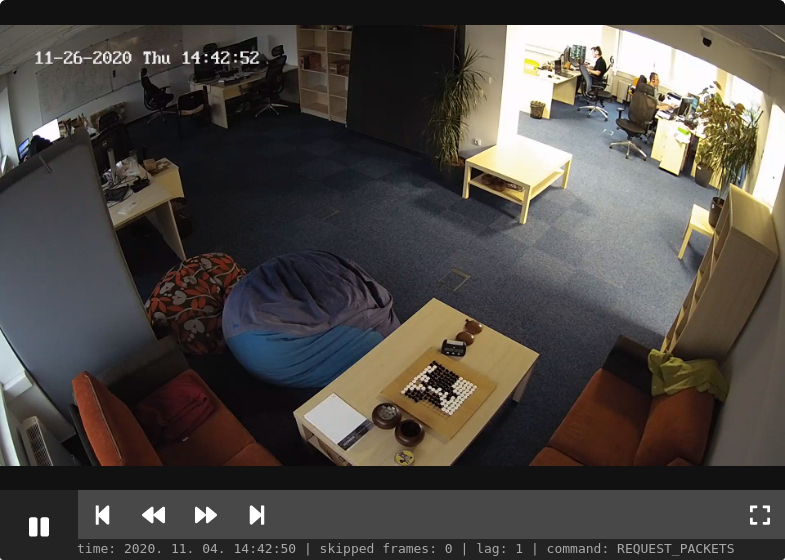
The preview image will be loaded later automatically.
If the provided information was correct and U-alarm can access the stream you should see a live view as on the image below:
Step 2 - Configure an alarm
- Click on Alarms on the left menu bar.

- Click on the New Alarm button.
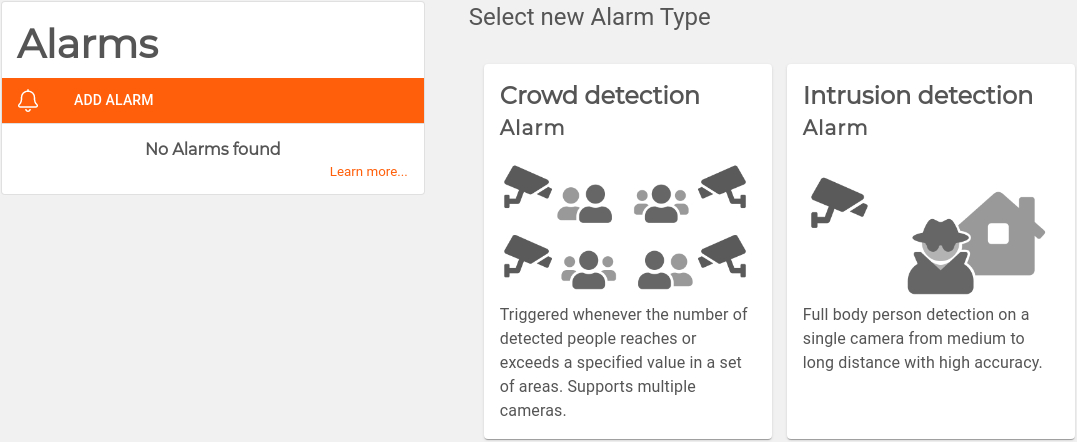
Click on the Intrusion detection (moving camera) box.
Configure the Alarm. Set the Name.
Now select the previously registered camera. In this guide the entire video will be analysed.
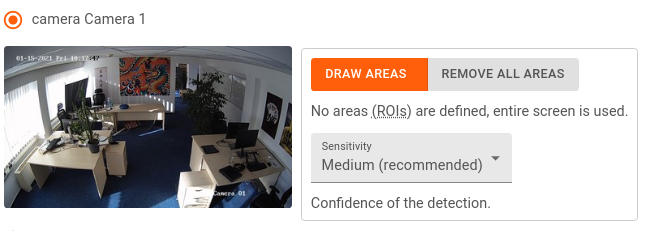
Leave all the other settings on their default value.
Click on the Submit button.
Step 3 - Handle events
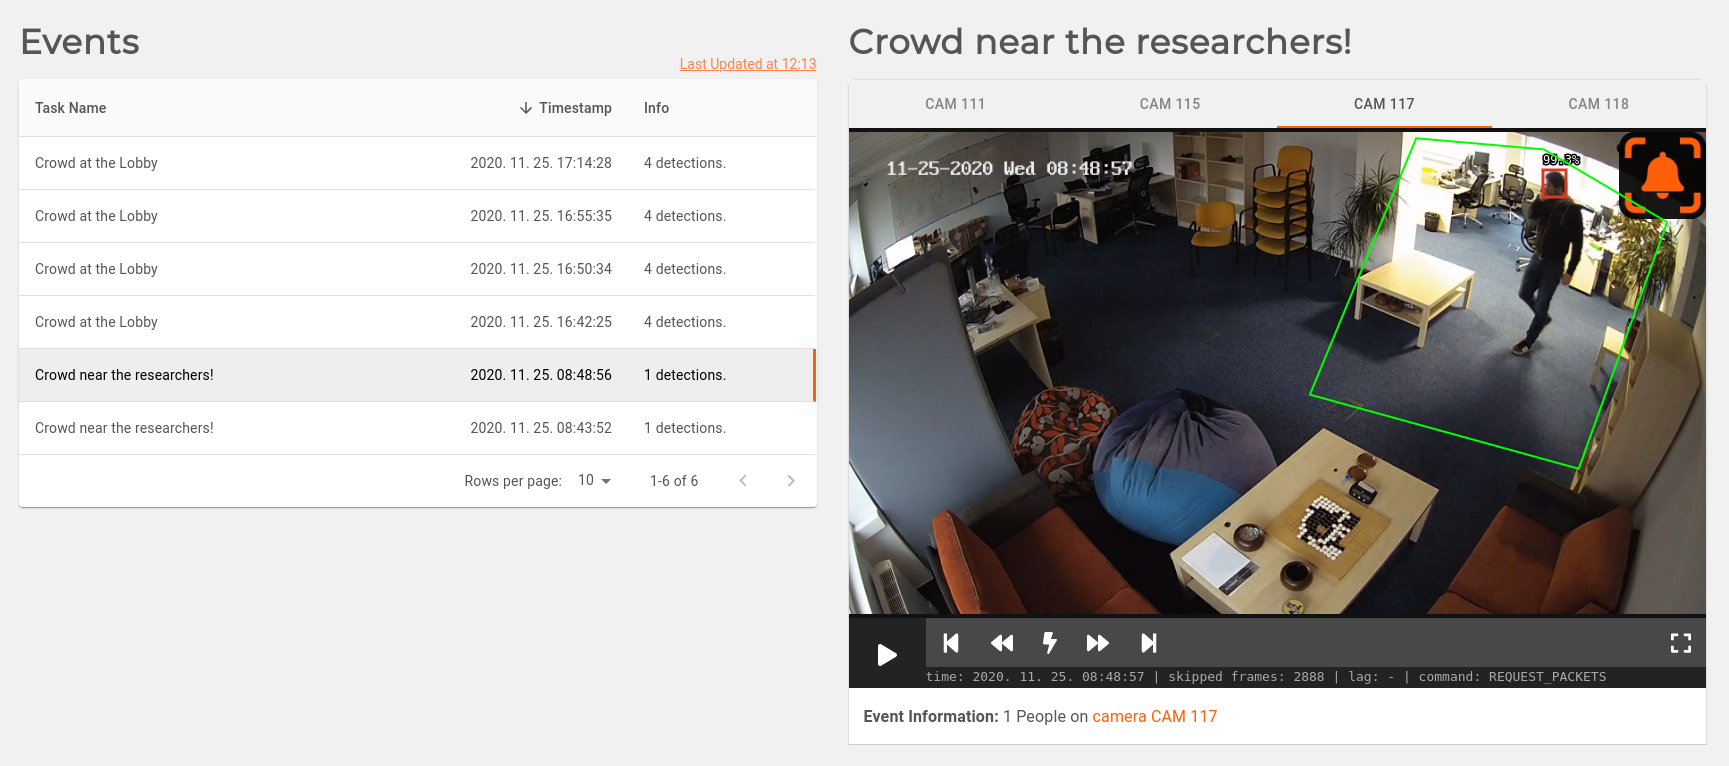
At this moment everything is set up and U-alarm is operating. While U-alarm is opened in your browser you can see the following indications of a newly triggered Event:
A Bell icon is displayed in the Live video player if the Cameras page is active.
A notification bar appears at the bottom right side of any page. The bar will not disappear until it is closed manually or the incident is investigated by clicking on the More link on it.
A Beeping sound is played (unless the browser tab is muted).
You can mute / unmute a browser tab by right-clicking on the tab and selecting the appropriate function.
New records appear in the Events view.

By clicking on the More link on the notification or by clicking on the Events menu on the left side the Events page will appear. All events can be checked and replayed here one by one. Each camera's records can be replayed by selecting the camera at the top of the video player.
After finished
All done. If you would like to learn more about U-alarm please visit the User's guide.